February 29, 2012

Beginning Sounds of Our Names


Children’s names are the most important words for them. So when you review the beginning sound of their names they are usually very excited about it.

The last time we reviewed the beginning sounds of our names I started by placing their letters in the middle of the circle and they had to find their own.

Then we used seeds to glue on the letters.

After the seeds dried the students worked in small groups. I precut pictures of objects that had the same beginning letter of their names and placed them all in the middle of the table. The students had to first sort out the pictures and then glue them next to their letter sound.

They shared their work in their small group and then with the whole class and we decided to place them on a bulleting board.

I thought the students would not look at the work anymore but once in a while a student gets our “pointer”, (the little blue hand you see in the picture) and they start looking at the seed letters and name the pictures around it. That is realy gratifying to see.

I like to have them revisit the board with varying approaches, for example I ask the children to say the sounds of the letters as I point to them, then they say the word out loud.  We spelled words like cat, mat, hat, fat, sat, can, fin, dad, Sam, ham, mad, and a few more.

This will go in their portfolios as a result of the enthusiasm the students showed towards their work.

February 28, 2012

Stencils! Fun and Easy!


There is something about stencils that is unique and fascinating. You create precise designs using a dabbing technique without the need to draw anything.

All you need is a stencil, paint in a small container and a piece of foam.

If you blue tack the stencil on the paper it works even better because the stencil won’t slide. Put only a very small amount of blue tack or the paint might run underneath.

I have a box full of stencils and the students wanted to use the butterfly probably because we have been talking about the life cycle of butterflies.

There are so many ways you can use stencils, from being part of journal writing to describing, talking about it, or simply creating a beautiful image.

We used the butterfly stencil on an A4 paper. I could have done 4 different colors of the same butterfly on an A3 paper. It all depends on what your objective is. Mine was just to promote one more way to make a butterfly and observe how one side looks like the other (symmetry).

Amelia Mello, M.Ed.

February 27, 2012

Watercolor Rainbows


Watercolor Rainbows artwork is a win win situation. It is easy, simple and fun to paint a watercolor rainbow and the end result is beautiful.

We made rainbows because of the letter ‘R’. Using the Starfall website we watched the letter sound ‘R’ animation and rainbow was one of them.

After some discussion, knowledge sharing, talking about our experiences with rainbows and looking at books with rainbows we decided to make our own. 

The students already knew how to work with watercolor paint so the technique was not a problem. To help them know which colors to use I projected a rainbow on the white board and I also made a model with their help. The key clue is to tell the students to start painting the rainbow at the bottom with the purple.


Here is the result. Twenty-two beautiful rainbows!

Today the students shared their rainbows with the whole group and they all received a well deserved round of applause. They were proud of their work as they should be.

The students decided to put their work in their portfolios.

Amelia Mello, M.Ed.

February 24, 2012

Kindle Books in the Classroom

I recently found adorable Kindle books by Gerald Hawksley on Amazon. He actually wrote a few books especially for the Kindle format but he also has books that are paperback versions.
 
I have the books on my Kindle for Mac and I project them on the white board. The children love it. Gerald’s stories are perfect for Pre-K and K. They are entertaining, have colorful illustrations, lots of rhyming words and you can use them in a lot of different ways.

In my opinion Kindle books projected on a screen is a similar experience of reading big books, only better as the screen brings a whole new dimension to the book viewing. All the students can see the book very well for one and watching the colorful images of a book with print being read to you on a big screen in a dim lit room is a cool experience, almost like a movie. Only better because it is a ‘book’ and the teacher can work with a wide variety of approaches.

In the picture above I asked one of my students to point to a specific word.  I can have a student point to a beginning sound, ending sound, rhyming words, point to details on the illustration, and so much more.

I love using Kindle books in the classroom but not all picture books with a Kindle version come out well on the screen especially if they are conventional books with illustrations that spread over two pages.

Below are the books from Gerald Hawksley that I have bought so far and I recommend:
Happy Animals
If You Have a Hat
Happy Hat Day
Silly Monsters 1,2,3
Silly Monsters ABC

If you have any good recommendations of Kindle picture books for pre-school please drop me a note at mrsameliapreschool@gmail.com

Amelia Mello, M.Ed.

February 23, 2012

Our Butterfly Eggs Hatched!


We are investigating the “Butterfly Life Cycle” and one of my students brought a lots of caterpillars. It was wonderful to see so many of them but they ate all the leaves very quickly so I asked my student to bring more leaves, which he did.


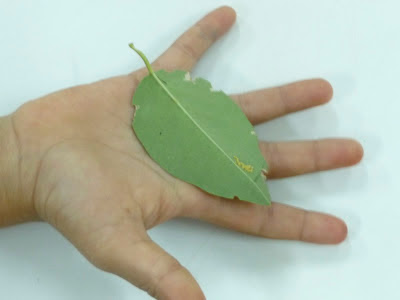
When I was holding the leaves I saw some little yellow dots on it and I realized they were butterfly eggs.

I was thrilled. And of course the children wanted to see and hold the leaf. The picture below gives you an idea of how small the eggs are.

 I took some pictures of the leaf. I showed the leaf with the eggs and the amplified picture on my camera viewfinder to the students. 


We had all seen and read many books about the life cycle of a butterfly and when I showed the ‘real eggs’ some of the students were really surprised. ‘They are soooo small’, they said.

On the next day one of the students looked at the leaf with the eggs and said, “The caterpillars are here!” I though he was daydreaming but to my surprise there were, tiny, really tiny caterpillars on the leaf. Some were still eating the eggshell as they do as soon as they get out of the eggs. It was an amazing experience. Again I took more pictures of the egg with the tiny caterpillars and showed to the students.

My pictures are not as sharp as the ones from the books.  I need another job to buy the camera and lenses needed to get into macro photography and take pictures similar to the ones in the books, but we can still see quite well the caterpillars and the eggs.

I placed the leaves on a tray with a couple of magnifying lenses for the students to observe as much as they wanted.

What an unexpected bonus for our investigation.

From this whole experience we decided to do a butterfly life cycle artwork, which I will post later.

Amelia Mello, M.Ed.

February 22, 2012

Watercolor Question Marks


To introduce question marks to the students I read the book Cat’s Colors by Jane Cabrera, which is the story of a cat asking you what his favorite color is. It is also a great book to work with colors.  

I traced a question mark similar to the one in the book and the students used watercolors to paint them.


They turned out so beautiful.

I cut and assembled them using tape on the back to hold the parts together,  


and another piece of tape in front so the sticky part wouldn’t stick anywhere else.

As a whole group we discussed if asking questions is a good thing. We came to the conclusion that we learn more if we ask questions.  We turned that conclusion into a question. After we used our question marks we decided to blue tack them on a board. Why? The answers were varied. Because they look so nice, because they are beautiful and colorful and because we can look at them to remember to ask more questions!

I modeled asking questions holding my question mark and some students wanted to do the same.

I traced the question marks on A3 watercolor paper but you can do on A4 paper, which is the size of the model below.
click here to download the file

Amelia Mello, M.Ed.

February 20, 2012

Butterfly Number Sense


Recently I discover pieces of an old bulletin border with butterflies and they looked beautiful and so real that I had the idea to cut out the butterflies and glue them on skewers to work with number sense.
First I observed if the students liked the butterflies and they surely did.

Here are some of the ways I used to work with number sense.

Count the butterflies:
How many are you holding? 

How many are on the table?
How many are on the leaf? 
How many are flying?

Number knowledge - Compare quantities:
You hold these and you hold these.
How many do you have? and you?
Who has the larger number of butterflies?
Who has the least amount of butterflies?

Story problems with object reference:
Two butterflies were flying then one joined in. How many are flying altogether?


Four butterflies were flying then one decided to fly away. How many are flying now?

Non-verbal calculation
I make two butterflies fly and hide behind a chair but do not say anything. Then make one more fly and hide behind the chair. Then ask: How many butterflies were flying? or are hiding?

This was the students favorite activity. They were so quiet and paying close attention to how many butterflies were disappearing behind the chair.

Addition and subtraction with no object reference:
How much is one plus one? Two minus one?

I do the problems according to the students’ level of ability.

The students were also invited to create their own story problems.


It is essential for preschoolers to explore NUMBER SENSE in different ways. You need to make it fun and use different strategies like the ones I mentioned above as well as many others.

Find something they like. You can use the students themselves.
The bottom line is that working with number sense continuously expands your students’ Math abilities and they will carry this on to the next grade levels. 

Amelia Mello, M. Ed.

February 18, 2012

Classroom Quilt


This week we made a hand quilt to celebrate the letter Q. To make the quilt I traced the children’s hands on paper and I cut them myself, as cutting around a hand with fingers is asking too much for the age group that I have in my preschool. 


Here are the developmental benchmarks for cutting with scissors:
3;6 years old – cuts with scissors following a straight line
4;6 years old – cuts with scissors following a curved line
5;0 years old – cuts a square ad triangle
5:6 year old – cuts picture following general shape - the complexity of the shape has an impact on the ability to cut with precision

If you look at the quilt picture it is easy to figure out how I did it. Yellow hands on blue squares, orange hands on green squares, red poster paper and green, yellow and blue borders.

I assembled the quilt on Thursday afternoon and placed it on the floor so when the children arrived on Friday they were excited to see the quilt. They began looking for their hands based on the size and color they had chosen. A few students asked whom the big hands belonged.  I asked them to read the names and they knew it was either Mrs. Amelia or Mrs. Amen. They quickly figured out that Mrs. Amen had the ‘nnnn’ at the end so the mystery was solved.

One of the words in the Starfall website for the letter Q is quilt and when the students saw the quilt on Starfall they all screamed “it is like ours!”

I helped younger students write their names and I did it in print, as it is easier for them to trace. Some students asked me to trace the name in pencil so they could go over it and some wanted to write their name independently.

We hung our quilt outside the classroom. I think it looks great!

As an added information it is great t have the children ‘cut’ paper with their hands which is basically ripping paper using the correct technique. This is the skill we used when we did our fish. You can see this post by clicking on the link below.

Hope you liked it!

Amelia Mello, M.Ed.

February 17, 2012

Using the Starfall Website at School


I really like the Starfall website and I have been using it a lot to work with the letter of the week and review other letters of the alphabet. I have a projector connected to the Internet and I use the Starfall website for letter sounds and to read phonics books. I do it as a whole group activity.

I always put a child with good mouse control in charge.  When working with letter sounds I ask the child to click on the letter of the week first and then he/she can choose two or three other letters to click and we watch the animation.  If you are working with a SMART board, the need to have a student with good mouse skills is eliminated.

They usually choose the first letter in their names besides the letter of the week, which is a must do. I find that doing two or three letters per day is enough and that leaves them wanting for more.
 Here is one of my students leading the Starfall letter sound work.

This is the main screen for letter sounds on the Starfall website.


My students love to learn new things but as we know from child development, children love to review things they already know. They know some of the letters by heart and they keep asking to do the Starfall alphabet again and again. It is like when they ask me (or their parents) to read the same book many times. It could also be that knowing the letters so well and being able to predict what the next word for that letter is going to be, gives them a sense of ‘being knowledgeable’.

Anyway, repetition if meaningful and if it reflects students’ interests is a wonderful way to internalize and sediment knowledge. My students are also using this knowledge in different contexts thinking critically, which is ultimately what I want them to do.

The Starfall link is http://www.starfall.com/

Enjoy!

Amelia Mello, M.Ed.

February 14, 2012

Valentine Cards


Today we made Valentine’s cards, of course.

I had two objectives with this lesson. The first was writing with a purpose with an audience in mind. The second was to use fine motor skills.

I wrote a few possible messages with the students but most of them opted for the one you see below. I think they liked the little pink heart. I left the models at hand if they needed to copy.


It was interesting to observe how each student did the writing. Most would write ‘I’ then glue the heart and finally write ‘U’. The student below decided to write the two letters first and then stick the heart.


I pre cut small hearts so the whole process would not take too long as I have 3 year olds in the group. I gave them four different colors of tissue paper pre cut in small squares. Students could also choose to make more than one card, which very few did.            

Crumpling little pieces of tissue paper is a great fine motor exercise.


It was also a great opportunity for me to observe how the students organized their own workspace and materials as they carried on with the project.


It was nice to see how different they turned out.

Happy Valentines to all! 

Amelia Mello, M.Ed.

February 13, 2012

Bubble Paint! Always Fun!


I used bubble paint today with the Kindergarten and First Grade students who come weekly for an afternoon Fun Club with me. We had lots of fun bubble painting!

I finally got a recipe that worked. The others were really too faded or did not work at all.

Mix:
50 ml water
120 ml dish soap 
40 ml food coloring (the children liked the colors strong)


The secret is to put lots of dish soap and lots of food coloring but it will depend on the quality of the soap and the food coloring. So the best you can do is to try before you give it to the students.

Blow through a straw until the bubbles overflow

 Press the paper on the bubbles.

 Lift the paper to see the bubble print and continue until you are happy with the results.

It will get messy!

Some students wanted to use only one color.

Others used all three colors available.


I also liked it that some children decided to touch the paper to the rim of the bowl. It added some nice round patterns.

Careful with the clothes as food coloring stains clothing, so use an apron!

This is a great weekend project!

Amelia Mello, M.Ed.